Have you seen the Wild Kratts show on PBS yet? It's great for kids, lots of science and imagination and I don't even mind watching it with the kids from time to time. If you haven't heard of it yet, check it out on PBSkids.org/wildkratts where you can watch episodes, play games and create printables.
We made a bunch of creature power discs a few months ago. I printed two of everything on my computer and Jacob and I cut them all out, then laminated them and cut them out again! It was a lot of work but totally worth it. They have been well loved since then. I even had one go through the wash last week and it came out fine.
Since we made the discs my oldest has been asking for a Creature Power Suit, which I promised to make him. But when you're a busy mom sometimes those things get put to the back burner. The boys have been using Painter's Tape on the back of the discs and they were working fine, so it was easy to put off UNTIL my kids got word that their friend's mom was making them creature power suits!! So why not? Now's the time, they went together surprisingly well and I think they turned out super cute.
Jacob really wanted to help make the suits but when there is sewing involved the only thing that a kid can really do is push the pins back into the pin cushion and roll up the extra thread; he was a good sport about it though.
I decided to make the Creature Power Suits so that they slip over the kid's heads. One, so they could put them on themselves and two, because felt and Velcro are best friends and worst enemies (if you know what I mean). I used my oldest son's tank top to make a pattern on wrapping paper. Then I tweaked it a little and cut it out on felt. I straight stitched around the edges of the felt pieces to make sure they stay put.
I made a couple blue and green felt bars to sew on each of the shoulders. I used a large coffee mug to trace out the paw print on the front and a Powerade cap for the paw prints. Again, trying to stay away from the Velcro, I cut out a clear plastic circle and sewed most of the way around it to create a clear slot for the creature power disc its self. The plastic was from a plastic zipper bag like the ones you get sheets, pillow cases or other bedding in.
Here's a close up of the Creature Power Disc inside the disc holder:
As you can tell from the pictures I made one green and one blue for Martin and Chris, the two characters. However, you will see in the picture below that my boys are BOTH wearing Martin's blue Creature Power Suit! That's right, I made the perfect little green Creature Power Suit for my little man and he was less than impressed. Apparently blue (the color of a New Holland Tractor) is the best (today!). Good thing I had a few extra materials ;)
Lemon Shark power and Pigeon Power!
Let your imagination soar!
PRINTABLE CREATURE POWER DISCS
Showing posts with label Crafts. Show all posts
Tuesday, July 1, 2014
Friday, April 11, 2014
Making Easter Memories
Each year I've made a tradition to take a picture of the Spring's first flowers. Usually, in Michigan, we get Crocuses firs. This year they showed their beautiful faces on March 31.
I love spring; the sunshine, the flowers, the birds chirping, the horses shedding their coats, the mud puddles, the warm air, the new life. I love the new life around us and I love to celebrate the new life we have in Christ with my family. I love teaching my children about our salvation through the Easter story. With a little help from Pinterest we've found some awesome activities to do with our children each spring.
1. Resurrection Eggs
Last year my friend introduced to Resurrection Eggs, she found out about them through her MOPS group. What a beautiful idea to change the use of plastic Easter eggs to be less about candy and more about His glory. Life Your Way has it all laid out for you; a materials list and FREE printable! Each night at dinner we open one egg and discuss the Easter story. Each egg contains a small snip it of the Easter story and a small tangible item that represents it. We also encourage the kids to recall the previous eggs that we've opened. The little items in the eggs help offer memory prompts. Last year our 3 1/2 year old could tell you the entire Easter story!
2. Resurrection Garden
This is our second year planting a resurrection garden. We usually plant it 2-3 weeks before Easter. If you use annual rye grass you can have nice tall green grass in a week! It's good to discuss the tomb, the boulder and the three crosses as a family as you make the garden. You could even 'play' with the garden by placing some linen or gauze in the tomb on Good Friday and sealing it with a boulder and on Easter (while the kids are still sleeping) remove the linen and roll the rock away. The Encouraging Home has a full tutorial available.
This year Grandma B. was here to help Jacob make his resurrection garden.
Another idea would be to plant a resurrection garden and give it to an elderly person in your church, either as a thoughtful gift or as a thank you.
3. He is Risen Cards
We made these super cute and very easy cards to send to all of our grandmas for Easter. Our kids are lucky enough to have 2 grandmas and 2 great grandmas so we made four of them! The cards are simply cut and paste paper scraps. Cut out a sunshine, a few long strips to make into crosses, a brown 'hill' with a hole in it, a gray rock and some grass strips that have slits in them for texture. We made our boulder so it was attached only on one side. When you fold open the boulder the front of the card says He Is Risen!
I love spring; the sunshine, the flowers, the birds chirping, the horses shedding their coats, the mud puddles, the warm air, the new life. I love the new life around us and I love to celebrate the new life we have in Christ with my family. I love teaching my children about our salvation through the Easter story. With a little help from Pinterest we've found some awesome activities to do with our children each spring.
1. Resurrection Eggs
Last year my friend introduced to Resurrection Eggs, she found out about them through her MOPS group. What a beautiful idea to change the use of plastic Easter eggs to be less about candy and more about His glory. Life Your Way has it all laid out for you; a materials list and FREE printable! Each night at dinner we open one egg and discuss the Easter story. Each egg contains a small snip it of the Easter story and a small tangible item that represents it. We also encourage the kids to recall the previous eggs that we've opened. The little items in the eggs help offer memory prompts. Last year our 3 1/2 year old could tell you the entire Easter story!
2. Resurrection Garden
This is our second year planting a resurrection garden. We usually plant it 2-3 weeks before Easter. If you use annual rye grass you can have nice tall green grass in a week! It's good to discuss the tomb, the boulder and the three crosses as a family as you make the garden. You could even 'play' with the garden by placing some linen or gauze in the tomb on Good Friday and sealing it with a boulder and on Easter (while the kids are still sleeping) remove the linen and roll the rock away. The Encouraging Home has a full tutorial available.
Another idea would be to plant a resurrection garden and give it to an elderly person in your church, either as a thoughtful gift or as a thank you.
3. He is Risen Cards
We made these super cute and very easy cards to send to all of our grandmas for Easter. Our kids are lucky enough to have 2 grandmas and 2 great grandmas so we made four of them! The cards are simply cut and paste paper scraps. Cut out a sunshine, a few long strips to make into crosses, a brown 'hill' with a hole in it, a gray rock and some grass strips that have slits in them for texture. We made our boulder so it was attached only on one side. When you fold open the boulder the front of the card says He Is Risen!
4. He is Risen! Wall Sign
These beautiful wall signs are a compilation of two different ideas I found through Pinterest. The sign layout inspiration comes from Signs by Andrea and the chippy paint technique comes from I Should Be Mopping The Floor. I painted several layers of paint on these boards - black, turquoise, white - sanded them down a bit, added the font, stained and sealed them. I think they turned out awesome! If you like them too you can purchase one through my Etsy account, but hurry; I only made a few!
5. Canvas Painting
My 4 year old sun painted this canvas about a week ago. He asked if he could paint a canvas (I think he got the idea from watching Curious George) so I came up with this technique for him. The first day we took brown and black paints and painted the entire Canvas Panel
. We let it dry over night then we masked off the bottom with blue Painters Tape
. To make the jagged rock base we simply tore the tape and put it on the canvas vertically - so we didn't have any straight lines. Then he cut some tape in half the long way and we tore into pieces to make the crosses. He painted the top half of the canvas with colors that he thought looked like the sky. The top took two coats because of the dark base so I let him speed up the drying process with the hair dryer set on low. After the second coat of 'sky' paint dried we removed the tape and here's what he was left with! This was a super simple craft and since it's on a canvas I've got it hanging on the wall for the entire month of April.
6. Colored Deviled Eggs
Your family, young and old, will love these beautifully colored deviled eggs. They'll feel like they're really eating Easter eggs! The eggs are easy to make and totally worth the time. Really - you could color the boiled egg whites with your kids rather than the shells that have to be removed later. The recipe is from FOODjimoto.com.
Photo Credit FOODjimoto.com
7. Stained Glass
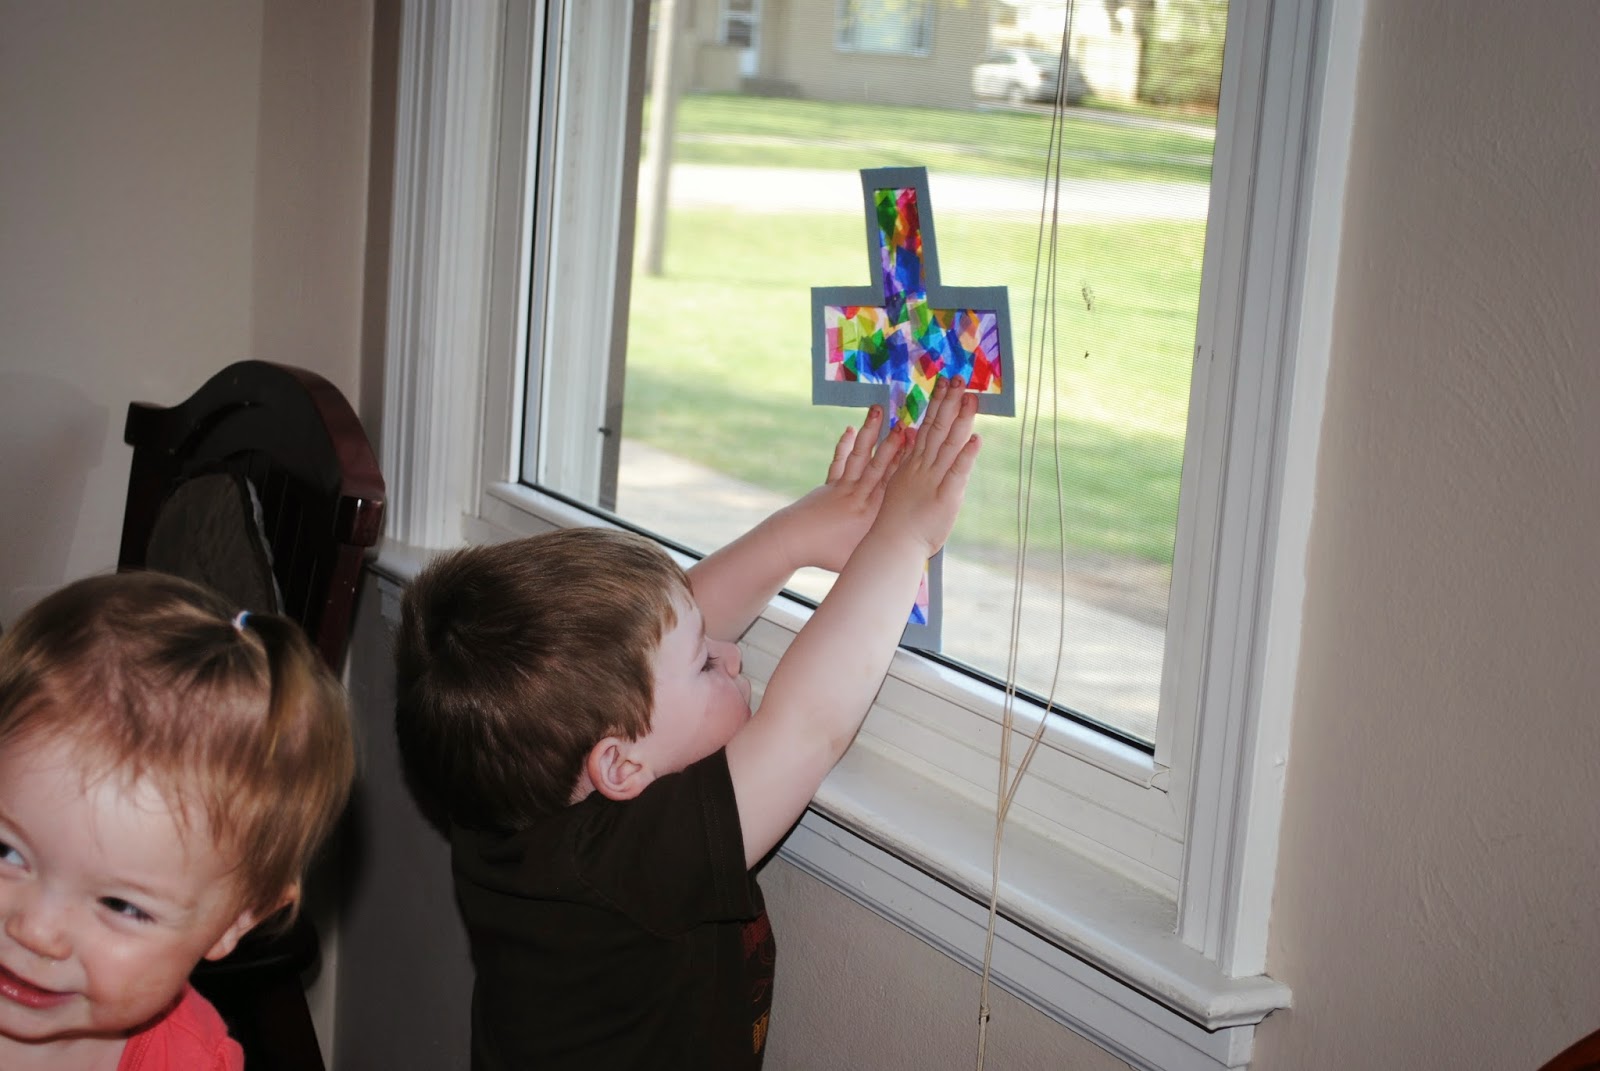
We made stained glass crosses that were inspired by Mrs. Karen's Preschool Ideas stained glass Easter eggs. This was a fun craft that we successfully did with 2 and 3 year olds. There is a little preparation required before you do the project but it is sure worth it. Hang your Easter cross or egg in the window for everyone to see; inside and out.
What ever it is for your family; crafts with kids, fabulous food, home decorations, time spent reading the word, praying or fasting I hope you find a way to make Easter special this year and every year.
"Praise be to the God and Father of our Lord Jesus Christ! In his great mercy he has given us new birth into a living hope through the resurrection of Jesus Christ from the dead, and into an inheritance that can never perish, spoil or fade. This inheritance is kept in heaven for you, 5 who through faith are shielded by God’s power until the coming of the salvation that is ready to be revealed in the last time."
Tuesday, February 18, 2014
How To Create a Custom Car Seat Liner
Here's a project I've been meaning to get at for a while now but a couple weeks ago I was REALLY prompted to get it done. We were visiting and staying with my parents for the weekend. Early Sunday morning my little one was sitting in her car seat (she does that often) when she dirtied her diaper (she does that often too). It went right through her jammies and onto the car seat cover. No problem, we had just enough time to wash and dry it before we had to leave for church. I tossed it in the wash and 30 minutes later I went back to put the car seat cover in the dryer. When I got to the laundry room the lid on the washer was still open, the washer was full of water and soap and a dirty car seat cover. I forgot to shut the lid! Darn! So I shut the lid and only had enough time to wash it ( but not dry it) before we left for church. My poor adorable infant had to ride to a and visit a church all the while strapped into a car seat with NO cover :( I felt like mom of the year that day and I prayed that she would sleep through the service so I wouldn't have to take a chance at someone seeing my short coming.
So, first thing when we got home from the weekend away I got some material to make this highly functional and totally adorable car seat liner. I thought I'd share my efforts with you too!
Materials
2/3 yard cotton material
2/3 yard batting (80% cotton 20% poly) I like to use Hobbs Heirloom
2/3 yard PUL (Polyurethane Laminate)
material
1/3 yard 1/4 inch elastic (you can buy Braided Elastic
pretty cheap on Amazon)
coordinating cotton thread
Make the Pattern
1. Gift Wrap - Get out your ugliest, oldest gift wrap and make your pattern out of it. The front design doesn't matter because you'll be using the white back to draw your pattern. I'm using some wedding themed gift wrap that I've had around forever. If you don't have any old gift wrap you can also use tissue paper but it's a little more delicate and less forgiving. My grandmother used to use newspaper but I wouldn't recommend that. Not only is it easy to loose your marks because of all of the writing (on both sides of it), but the black ink can rub off onto your project.
2. Make it Fit - Carefully fit the gift wrap into the car seat cover (either on or off the base). I started with the cover on the base and eventually took it off to lay and stretched it flat.
3. The Back Rest - Start with the back rest area and work your way down. Carefully fold the paper on the seams that go down the sides of the seat, being sure to leave a little extra at the top of the pattern.
4. Gently Trim - Once you have the seams folded into your paper, take it off and find the center point of your project the best you can. Fold the pattern down the center and trim the back rest area of the pattern.
5. The Seat - Fold the gift wrap horizontally at the bottom of the back rest (my car seat cover has a seam here). Do your best to match your wrapping paper to the seat; around the edges and at the bottom. Lightly mark the edges with a pen. Mark the edge of the seat flaps for an elastic loop that will help secure your liner to your car seat.
6. Make it the Same - Fold the pattern in half. Draw a straight line across the bottom of the pattern (parallel to the horizontal line between the back and seat). With the pattern still folded in half round just inside the edges that are marked. I trimmed the pattern while it was folded in half. Put the pattern in the car seat, see how it fits and trim (or add) accordingly. *Another great reason to use wrapping paper is that if you cut too much off you can just tape a little more on!
7. Mark the Belts - Start with the belts that are attached right at hip level. Cut horizontally about an inch and down about 2 inches on each side. Next, mark the receiver buckle that goes between the legs. Fold the pattern up where the belt lies and marked it with your pen. (Make sure to mark both positions because you're little person is sure to grow.) Finally, mark the shoulder belts. Again, fold the pattern then mark them with your pen on the white side of the gift wrap.
8. Get it straight - Now that your pattern is marked for the belts, fold it in half again and make sure that they are even. Straighten your lines with a ruler; make sure they are an even distance apart and that they stop the same distance from the center line.
9. Pattern Finishing Touches - Fit the pattern back into the car seat and make sure you like how it looks. I ended up trimming a little off the side flaps of the seat bottom.
10. Round it Off - Fold the top down to the height you want it fall. Take the pattern out, round off the top and trim it while it is folded vertically. Use the edge of a plate for the arc.
11. The Pattern - And there you have it; you're very own, very wrinkled, but very FREE car seat liner pattern!
Make a Car Seat Liner
1. Layer the Fabric - Layer your fabrics in this order: cotton batting on the bottom, printed fabric face up, then PUL face down.
2. Place the Pattern - Remember, the pattern fits the seat therefor you need to add a seam allowance; I added just under a 1/4 inch.
3. Pin the Pattern - Anywhere you put a pin through the PUL, IT WILL LEAK! Be careful where you place your pins. Put them very close to the edge of the pattern where you will be stitching or on the areas marked for the seat belts that will eventually be cut.
4. Cut it Out - Cut the pattern carefully, remembering to ADD a seam allowance around the entire outside.
5. Mark the Belts - Use a pen or fabric marker to mark the seat belt slits on the PUL, but DO NOT CUT them yet. (You don't need to mark the belt that goes between the legs at this point even though I did)
6. Remove the Pattern - Place the pins in the fabric very close to the edge or in the areas marked for the seat belt.
7. Mark Your Stitches - If you're not super careful you can end up sewing in the wrong spot, so I suggest marking your stitches on the PUL with an ink pen with a contrasting color, like I did in blue. Feel free to mark the whole pattern. You don't need to mark the belts that go between the legs (like I did) because they won't be sewn until after the fabric is turned right side out.
7. Elastic - Put elastic loops on each side of the seat area in between the printed fabric and the PUL, with the loop inside the material as shown above.
8. Sew it Together - Sew on the blue lines - around each of the seat belt areas (except the crotch area). Don't forget to leave an area at the bottom that is open so you can turn the project right side out. DO NOT SEW around the center belt in the seat area or you will not be able to turn your fabric right side out.
9. Confession - I actually sewed a lot closer to the seat belt lines than I marked, because you don't want gaping holes, just enough room for that skinny belt to fit through. You should probably sew them twice so that it will hold better when you turn the material right side out. The contrasting sewing lines did really help keep me on track which was nice.
10. Right Side Out - Turn the fabric right side out. Very gently push all of the corners out with a blunt object, I used an ink pen with the 'ink' retracted.
11. Cool Iron - Using a warm iron (I set mine on synthetic) quickly press the edges down. Be careful that the fabric doesn't get too hot because the PUL can MELT! Yikes!
12. Top Stitch - Top stitch the car seat cover with a straight stitch. Fold the fabric inside the hole that was left at the bottom and stitch over top of that too.
13. Mark the Belt - Take your pattern and cut slits in it where you marked for the seat belt that goes between the legs. Mark the fabric with a washable fabric marker through the slits you just cut in the pattern. ( In the picture below you can see that I used a black ink pen so you can see the lines better; it may or may not wash off.)
14. Satin Stitch - Using a satin stitch (zig zag stitch close together), stitch around, but not on the lines you marked.
15. Clip it - With your scissors, cut a slit in the fabric along the lines you marked. Be sure that you DO NOT cut through your satin stitching.
There you have it! Your very own custom car seat liner that will keep your kid's seat clean and your personal integrity intact ;)
I think it fits pretty well and the fabric is super cute (and a little more girly).
My little one seems to like it too!
So, first thing when we got home from the weekend away I got some material to make this highly functional and totally adorable car seat liner. I thought I'd share my efforts with you too!
Materials
2/3 yard cotton material
2/3 yard batting (80% cotton 20% poly) I like to use Hobbs Heirloom
2/3 yard PUL (Polyurethane Laminate)
1/3 yard 1/4 inch elastic (you can buy Braided Elastic
coordinating cotton thread
Make the Pattern
1. Gift Wrap - Get out your ugliest, oldest gift wrap and make your pattern out of it. The front design doesn't matter because you'll be using the white back to draw your pattern. I'm using some wedding themed gift wrap that I've had around forever. If you don't have any old gift wrap you can also use tissue paper but it's a little more delicate and less forgiving. My grandmother used to use newspaper but I wouldn't recommend that. Not only is it easy to loose your marks because of all of the writing (on both sides of it), but the black ink can rub off onto your project.
2. Make it Fit - Carefully fit the gift wrap into the car seat cover (either on or off the base). I started with the cover on the base and eventually took it off to lay and stretched it flat.
3. The Back Rest - Start with the back rest area and work your way down. Carefully fold the paper on the seams that go down the sides of the seat, being sure to leave a little extra at the top of the pattern.
4. Gently Trim - Once you have the seams folded into your paper, take it off and find the center point of your project the best you can. Fold the pattern down the center and trim the back rest area of the pattern.
5. The Seat - Fold the gift wrap horizontally at the bottom of the back rest (my car seat cover has a seam here). Do your best to match your wrapping paper to the seat; around the edges and at the bottom. Lightly mark the edges with a pen. Mark the edge of the seat flaps for an elastic loop that will help secure your liner to your car seat.
8. Get it straight - Now that your pattern is marked for the belts, fold it in half again and make sure that they are even. Straighten your lines with a ruler; make sure they are an even distance apart and that they stop the same distance from the center line.
9. Pattern Finishing Touches - Fit the pattern back into the car seat and make sure you like how it looks. I ended up trimming a little off the side flaps of the seat bottom.
10. Round it Off - Fold the top down to the height you want it fall. Take the pattern out, round off the top and trim it while it is folded vertically. Use the edge of a plate for the arc.
11. The Pattern - And there you have it; you're very own, very wrinkled, but very FREE car seat liner pattern!
Make a Car Seat Liner
1. Layer the Fabric - Layer your fabrics in this order: cotton batting on the bottom, printed fabric face up, then PUL face down.
2. Place the Pattern - Remember, the pattern fits the seat therefor you need to add a seam allowance; I added just under a 1/4 inch.
3. Pin the Pattern - Anywhere you put a pin through the PUL, IT WILL LEAK! Be careful where you place your pins. Put them very close to the edge of the pattern where you will be stitching or on the areas marked for the seat belts that will eventually be cut.
4. Cut it Out - Cut the pattern carefully, remembering to ADD a seam allowance around the entire outside.
5. Mark the Belts - Use a pen or fabric marker to mark the seat belt slits on the PUL, but DO NOT CUT them yet. (You don't need to mark the belt that goes between the legs at this point even though I did)
6. Remove the Pattern - Place the pins in the fabric very close to the edge or in the areas marked for the seat belt.
7. Mark Your Stitches - If you're not super careful you can end up sewing in the wrong spot, so I suggest marking your stitches on the PUL with an ink pen with a contrasting color, like I did in blue. Feel free to mark the whole pattern. You don't need to mark the belts that go between the legs (like I did) because they won't be sewn until after the fabric is turned right side out.
7. Elastic - Put elastic loops on each side of the seat area in between the printed fabric and the PUL, with the loop inside the material as shown above.
8. Sew it Together - Sew on the blue lines - around each of the seat belt areas (except the crotch area). Don't forget to leave an area at the bottom that is open so you can turn the project right side out. DO NOT SEW around the center belt in the seat area or you will not be able to turn your fabric right side out.
9. Confession - I actually sewed a lot closer to the seat belt lines than I marked, because you don't want gaping holes, just enough room for that skinny belt to fit through. You should probably sew them twice so that it will hold better when you turn the material right side out. The contrasting sewing lines did really help keep me on track which was nice.
10. Right Side Out - Turn the fabric right side out. Very gently push all of the corners out with a blunt object, I used an ink pen with the 'ink' retracted.
11. Cool Iron - Using a warm iron (I set mine on synthetic) quickly press the edges down. Be careful that the fabric doesn't get too hot because the PUL can MELT! Yikes!
12. Top Stitch - Top stitch the car seat cover with a straight stitch. Fold the fabric inside the hole that was left at the bottom and stitch over top of that too.
13. Mark the Belt - Take your pattern and cut slits in it where you marked for the seat belt that goes between the legs. Mark the fabric with a washable fabric marker through the slits you just cut in the pattern. ( In the picture below you can see that I used a black ink pen so you can see the lines better; it may or may not wash off.)
14. Satin Stitch - Using a satin stitch (zig zag stitch close together), stitch around, but not on the lines you marked.
15. Clip it - With your scissors, cut a slit in the fabric along the lines you marked. Be sure that you DO NOT cut through your satin stitching.
I think it fits pretty well and the fabric is super cute (and a little more girly).
My little one seems to like it too!
Subscribe to:
Posts (Atom)